Leave Your Message

How to Choose 3D Wall Panels for Your Project?

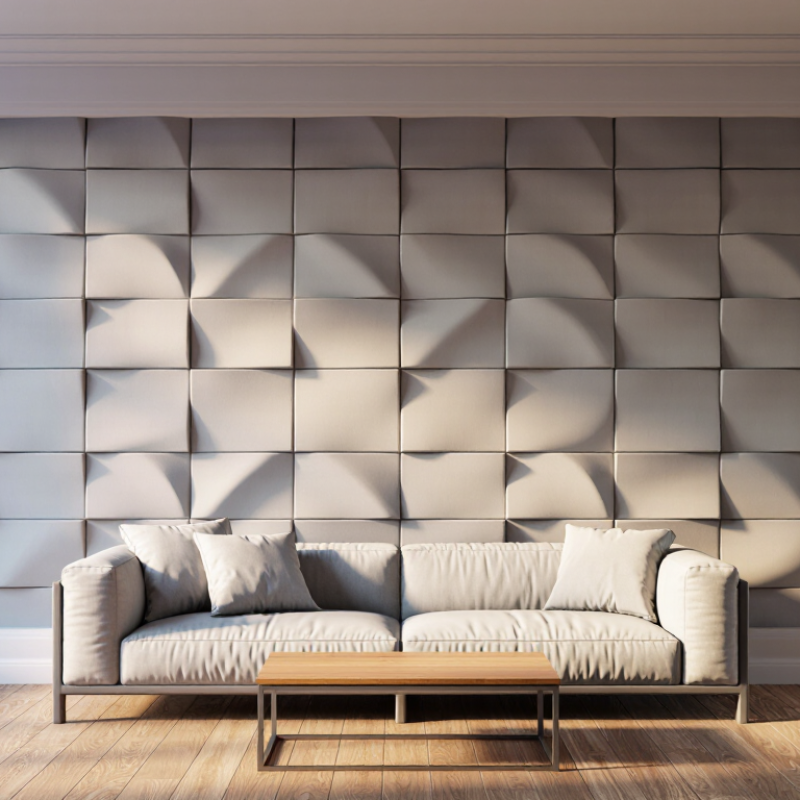
Choosing 3D Wall Panels is not only a style decision. The right choice should suit the room, the wall beneath it, and the way people use the space. A sculpted wave pattern can catch afternoon light beautifully, while deep geometric grooves may cast distracting shadows in a narrow hallway. Small details matter.

Designer Charles Eames famously said, “The details are not the details. They make the design.” That idea applies to wall panels: profile, finish, and installation can change how an entire room feels. Before comparing designs, check the wall’s condition and measure the area carefully. Then consider panel depth, material, cleaning needs, and how the surface will look beside flooring, furniture, and existing trim. A sample viewed under the room’s actual lighting can reveal color shifts that a screen cannot.

There is no universal best panel. Moisture, sunlight, room traffic, and installation requirements all affect suitability, so verify product specifications instead of relying on appearance alone. Some projects also need a more restrained pattern than the mood board suggests. That can be disappointing, but it is worth acknowledging: dramatic relief may overwhelm a small room. This guide explores the practical questions that help narrow your options, compare finishes, and plan installation with fewer surprises. It also points out where a beautiful choice may need a second look.
How to Choose 3D Wall Panels for Your Project?

Understanding 3D Wall Panels and Their Common Uses

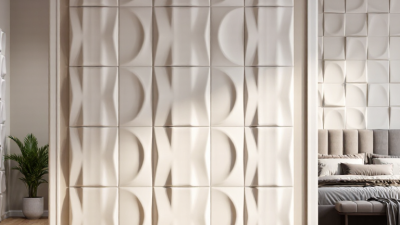
3D wall panels are decorative interior surfaces with raised geometric, linear, or organic patterns. They can add depth to a plain wall, soften a large blank area, or help define a reception desk or dining nook. Materials commonly include gypsum, wood, mineral composites, and molded polymers; each differs in weight, moisture tolerance, and finish options.

The U.S. Environmental Protection Agency estimates that people spend about 90% of their time indoors, underscoring how often interior finishes shape the spaces we experience. Yet a striking sample can feel overwhelming across an entire wall. Scale matters. A shallow pattern may suit a narrow corridor, while deeper relief can create a focal point in a lobby or living room.

Panels are also used in offices, hotels, shops, and media rooms, but decorative relief alone does not make a wall soundproof. For acoustic control, check tested absorption data, such as a Noise Reduction Coefficient, rather than relying on appearance.

Before choosing, consider the room’s humidity, cleaning needs, lighting, and installation surface. Side lighting can make small ridges cast sharp shadows; warm, even light often looks calmer. Ask for documented fire and emissions information, and confirm whether joints need sealing.

A small mock-up helps. I would still inspect the finished sample in the actual room, because color and texture can shift under its lighting.

Assessing Your Project Needs and Installation Conditions

Before selecting 3D wall panels, define what the room needs them to do. A reception area may need visual depth and easy cleaning, while a meeting room may benefit from tested sound absorption. Check the wall substrate, panel weight, moisture exposure, and available fixing depth. Photograph pipes, outlets, and uneven corners before measuring; small obstacles can complicate installation. Confirm that the specified adhesive or mechanical fixings suit both the panel and the existing wall. A decorative panel should not be assumed to provide insulation or acoustic control without verified performance data.

Installation conditions matter as much as appearance. Measure ceiling height and wall width, then request a sample to check color and shadow under the project’s actual lighting. Allow access to electrical fittings and plan how damaged panels could be replaced. The 2023 Global Status Report for Buildings and Construction, published by UNEP and GlobalABC, reports that buildings accounted for 34% of global energy demand and 37% of energy- and process-related CO₂ emissions in 2022. These figures do not show that wall panels reduce energy use; they underline why project teams should check material claims and avoid assuming a finish improves building performance. One detail is easy to miss: a textured surface can make dust more visible.

Tips: Test-fit one panel before ordering the full quantity. Check the manufacturer’s installation instructions against the wall condition, and record any site adjustments.

How to Choose 3D Wall Panels for Your Project? — Assessing Your Project Needs and Installation Conditions

Assessment Factor What to Check Typical Project Condition Panel Option to Consider Installation Implications
Room moisture Identify direct water exposure, humidity, and ventilation. Distinguish a dry feature wall from a shower or splash zone. Dry living room, bedroom, or office Gypsum, MDF, or other panels rated for interior dry areas Install on a clean, dry surface and follow the panel maker’s adhesive and finishing instructions.
Wet-area exposure Check whether the wall receives splashes, frequent cleaning, or persistent condensation. Bathroom outside the shower, laundry area, or kitchen backsplash Moisture-resistant PVC or another panel specifically approved for the exposure Use compatible adhesives and sealants. Do not assume a decorative panel is waterproof or suitable for a shower; verify the complete system’s rating and installation requirements.
Wall substrate Inspect for loose plaster, dust, peeling paint, unevenness, and signs of moisture damage. Sound, smooth plasterboard or masonry Lightweight panels compatible with the substrate and chosen fixing method Repair and clean the surface first. Adhesive bonding generally requires a stable substrate; mechanical fixings may be needed where specified.
Uneven or damaged walls Check wall flatness and whether defects can be repaired before installation. Older walls with noticeable irregularities Panels designed for a batten or subframe installation A subframe can help create a more consistent mounting plane, but it adds depth and may require careful trimming around sockets, doors, and windows.
Impact and durability Consider foot traffic, furniture contact, pets, and how often the surface will be cleaned. Hallway, reception area, or busy family room Durable panels with a finish suited to the expected wear and cleaning method Review cleaning guidance and replaceability. Protect panel edges and corners, which can be more vulnerable to knocks.
Desired appearance Compare relief depth, pattern scale, finish, and how shadows will look under the room’s lighting. Feature wall or decorative accent Panels with a pattern and finish proportionate to the wall size and viewing distance Order samples when possible. Plan the pattern layout and dry-fit panels before fixing to reduce visible misalignment at edges.
Lighting and panel relief Note the direction and intensity of natural and artificial light. Wall lit from the side by a window or wall washer Shallower relief if a subtle effect is preferred; deeper relief for stronger shadows Side lighting makes joints, surface variation, and installation errors more noticeable. Check a sample under the actual lighting conditions.
Fire and building requirements Check applicable local codes and any requirements for the building type or location. Commercial, shared, or regulated interior space Panels with documentation appropriate to the project’s required fire performance Confirm that the panel, adhesive, backing, and installation method meet project requirements; do not rely on appearance or material name alone.
Cutting and services Locate outlets, switches, pipes, vents, and other obstructions before ordering. Wall with multiple openings or fixtures Panels that can be cut with suitable tools and have clear installation guidance Measure and mark openings carefully. Isolate electrical circuits before working near electrical fittings, and use a qualified professional when required.
Quantity and layout Measure wall width and height, then account for doors, windows, pattern alignment, and cutting waste. One or more walls with corners or openings Panel size and layout that suit the wall dimensions and design pattern Calculate coverage from the actual usable dimensions of each panel. Allow for cuts and keep material from the same production batch where color consistency matters.

Planning note: Panel properties and installation methods vary by product. Confirm the intended application, substrate compatibility, fixing method, maintenance guidance, and applicable local requirements in the product documentation before purchase.

Comparing Panel Materials, Profiles, and Performance

Choosing a panel material starts with the room, not the finish. PVC-based panels can suit humid areas, but check the product’s moisture and fire ratings. MDF offers crisp profiles and a smooth surface, yet it needs suitable protection where splashes are likely. Gypsum and mineral-composite panels may feel more substantial, though their weight can require stronger backing. Ask for a sample. Hold it beside the actual wall, since showroom lighting can hide subtle color shifts.

Profile depth changes both appearance and upkeep. Shallow grooves create a quiet texture and collect less dust; deeper relief casts stronger shadows under side lighting. In a narrow hallway, a bold pattern may feel crowded. On a broad feature wall, it can add welcome depth. Check how panel edges meet at corners and around sockets. A small mismatch becomes obvious once repeated across a wall.

Performance depends on more than the panel itself. Acoustic improvement usually requires a tested system, including its backing and installation method; a textured face alone is not proof of sound control. Compare impact resistance, cleaning instructions, weight, and approved fixing methods. Then confirm that the wall substrate is flat and sound. One detail is easy to overlook: repairs may be difficult if spare panels are unavailable. I would still weigh appearance heavily, but perhaps that is not always the practical choice.

Choosing Panel Dimensions, Finishes, and Design

How to Choose 3D Wall Panels for Your Project?

Start with the wall’s actual width and height, then map doors, outlets, corners, and trim. A 600-millimeter panel may look balanced in a showroom but awkward beside a narrow doorway. Sketch the layout and calculate how cuts will land at both edges. Scale matters. Check whether the pattern repeats across panel joins, especially with geometric reliefs. A small misalignment can catch light and become surprisingly noticeable.

Choose a finish for the room’s use, not just its sample-card appearance. Matte surfaces soften glare; deeper textures collect dust and need more careful cleaning. The U.S. Environmental Protection Agency reports indoor VOC levels are commonly two to five times outdoor levels, and can rise much higher after certain product uses. Ask for emissions information and care instructions for the panel and its coating. Houzz’s 2024 U.S. Houzz & Home Study reported a median renovation spend of $24,000 in 2023, making early finish checks a sensible way to protect the budget.

Relief changes shadows throughout the day, so view a full-size sample under the project’s real lighting. Test one first. For acoustic goals, request measured absorption data, such as an NRC rating tested under ASTM C423; decorative depth alone does not confirm sound control. I still find mock-ups a little cumbersome, but ordering without one can be the more expensive gamble.

How to Choose 3D Wall Panels for Your Project?

Compare example panel dimensions by the wall area covered by each panel.

Coverage is calculated from the listed dimensions (width × height); for example, a 24 × 48 in panel covers 8 sq ft. Panel sizes vary by product. Choose a finish and design to suit the room, and check the manufacturer’s specifications before ordering.

Planning Installation, Maintenance, and Long-Term Care

Before choosing 3D wall panels, check the room’s moisture, cleaning routine, and access needs. Kitchens, bathrooms, and entryways need finishes that tolerate frequent wiping. In dry rooms, deeply sculpted surfaces can collect dust in their grooves. Plan panel joints away from pipe access points and likely impact zones. Small details matter.

Installation conditions affect long-term care. Leave the expansion gaps specified by the panel manufacturer, and let materials acclimate as directed. EPA’s A Brief Guide to Mold, Moisture and Your Home advises drying wet materials within 24–48 hours to help prevent mold growth.That matters behind panels, where leaks may stay hidden. Keep inspection access near plumbing and seal edges only with compatible products.

Choose cleaners before installation, not after. Test them on an offcut; some solvents can dull coatings or damage adhesives. EPA guidance in Mold Remediation in Schools and Commercial Buildings recommends keeping indoor relative humidity below 60%, ideally between 30% and 50%.A simple humidity meter can flag persistent dampness. Vacuum grooves with a soft brush, then wipe with a lightly damp microfiber cloth. I would not assume every textured panel is low-maintenance; dust can settle where a quick wipe misses it. Keep a small care log, especially in busy rooms.