Choosing 3d Wall Panels begins with the room, not the product photograph. Consider where the panels will go, how people use the space, and what the surface must withstand. A calm bedroom wall may suit lightweight decorative panels. A busy hallway needs a finish that is easier to clean and less prone to damage. Small details matter: a panel beside a window may catch side light, making every ridge and seam more visible.
As an illustrative expert voice—not a sourced quotation—interior-materials specialist Maya Chen might put it this way: “Choose the panel for the light, traffic, and maintenance the room actually has.” Treat that as a practical prompt, not a substitute for product specifications. Check the manufacturer’s installation guidance, weight limits, substrate requirements, and care instructions. Ask for samples, then view them in the project’s real lighting. A warm white can look cool beneath daylight; a deep texture can cast sharper shadows than expected.
This guide explores how to compare materials, patterns, sizes, and finishes without losing sight of installation and upkeep. It also considers budget, room proportions, and the visual effect of repeated shapes. There is no universal best panel. Sometimes the most dramatic option is not the most useful one. Measure carefully, test a sample, and leave room to reconsider before ordering.
PVC is lightweight and resists moisture, making it useful in bathrooms, laundry areas, or kitchens with good ventilation. Check the product’s heat rating before placing it near a stove or heater. Its surface can look crisp, though some finishes feel less natural up close.
MDF panels suit dry living rooms, bedrooms, and office walls where a smooth, paint-ready surface matters. They are easy to cut, but moisture can cause swelling, so seal edges and avoid damp locations.
Solid wood adds grain, warmth, and variation; a sample may look different across the full wall. It can expand or contract with humidity, so allow it to acclimate indoors before installation. A small gap helps.
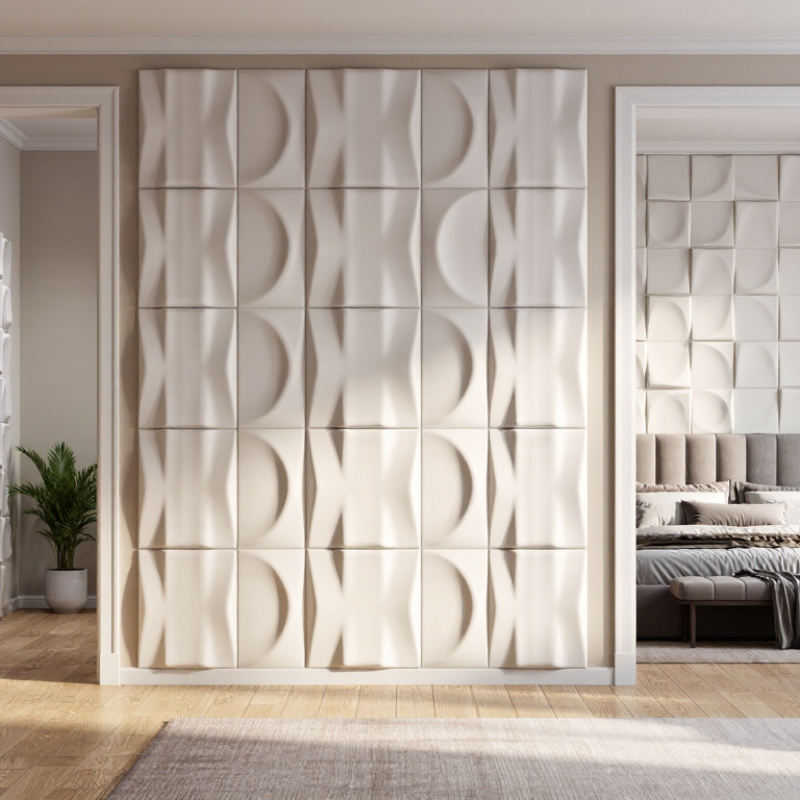
Gypsum panels are often chosen for interiors that need a refined, sculpted look or improved fire performance, depending on the panel’s tested specification. They can be heavier and more fragile during handling, so confirm wall support and follow installation instructions. A raised pattern may collect dust in narrow grooves. That detail is easy to miss.
Before choosing, compare weight, room humidity, cleaning needs, and the wall’s condition; the cheapest material is not always the easiest to live with.
How to Choose 3D Wall Panels for Your Project?
Measure Wall Area and Relief Depth Before Selecting Panel Dimensions
Measure the wall’s width and height in several places; floors and ceilings are rarely perfectly level. Subtract doors and windows, then record outlets, switches, corners, and trim. Multiply the usable width by height to estimate coverage, and compare it with each panel’s face dimensions. Allow extra material for cuts and alignment. A small admission: neat measurements can still miss an awkward corner.
Relief depth matters as much as panel size. Deep profiles cast stronger shadows, but may crowd narrow walkways or interfere with nearby cabinets and switches. Check the product’s full projection, not just its face thickness, and test a sample under the room’s actual lighting. Also inspect the wall for bows; rigid panels can reveal uneven spots instead of hiding them. Harvard’s Joint Center for Housing Studies estimated that U.S. homeowners spent $472 billion on improvements and repairs in 2022, underscoring the scale of renovation investment. Careful measurements can help limit avoidable offcuts and fit problems. Recheck before ordering. That extra pass is easy to skip.
How to Choose 3D Wall Panels for Your Project?
Compare Fire Ratings: ASTM E84 Class A Means FSI 0–25 and SDI ≤450
When selecting 3D wall panels, examine their fire-rating documents carefully. Under ASTM E84, Class A means a Flame Spread Index from 0 to 25. It also means a Smoke Developed Index of 450 or less. These numbers describe surface-burning behavior during a controlled test. They do not predict every fire condition inside a finished building.
A useful review starts with the exact panel specification. Check the tested thickness, panel composition, backing, adhesive, and installation method. A decorative panel may perform differently when installed over plywood, insulation, or an air gap. Ask for a current test report, not only a product label. Confirm that the report matches your proposed assembly and project location.
The label is helpful, but incomplete. A common mistake is treating Class A as unlimited fire protection. That assumption needs correction. ASTM E84 does not measure structural strength, toxic smoke, or performance after prolonged exposure. I would also inspect joints and cut edges, where installation details can become weak points. Local building officials may require additional tests or documentation. Review those requirements before ordering materials, especially for corridors, exits, public rooms, and tall wall sections. Test conditions are controlled. Real rooms are not.
| Fire Classification | Flame Spread Index (FSI) | Smoke Developed Index (SDI) | ASTM E84 Interpretation | Selection Guidance for 3D Wall Panels | Verification Requirements |
|---|---|---|---|---|---|
| Class A | 0–25 | 0–450 | Lowest ASTM E84 flame-spread classification. | Preferred where project specifications require Class A interior wall or ceiling finishes, subject to the applicable building code and assembly requirements. | Request a valid ASTM E84 test report for the exact product, thickness, surface finish, and installation method. |
| Class B | 26–75 | 0–450 | Intermediate flame-spread classification. | May be acceptable in applications where the code or project specification permits Class B materials. Confirm requirements before selection. | Check the tested product configuration and whether the report applies to the intended substrate and mounting system. |
| Class C | 76–200 | 0–450 | Highest flame-spread range recognized by the ASTM E84 classification system. | Use only where the applicable code and project requirements allow this classification. | Obtain project-specific approval when the installation is in a regulated occupancy or egress area. |
| Test scope | Measures flame spread along the exposed surface during the test. | Measures smoke development during the test. | ASTM E84 is a surface-burning test, not a complete fire-resistance rating. | Do not treat an ASTM E84 classification as proof of a fire-resistance-rated wall, smoke barrier, or fire-rated assembly. | For fire-resistance performance, review the complete tested or listed wall assembly and its required rating period. |
| Panel material | Results depend on the specific material formulation and construction. | Different cores, facings, coatings, adhesives, and finishes can produce different results. | Compare the fire classification of the complete panel system rather than relying only on the base material name. | Confirm that the report identifies the same panel composition, decorative surface, adhesive, and backing used on the project. | |
| Panel thickness | The tested thickness must match the proposed product whenever possible. | Changing thickness or construction may affect test performance. | Record panel thickness in the submittal and avoid assuming that a result for one thickness applies automatically to another. | Ask for evidence covering the exact thickness or an accepted product range supported by the test documentation. | |
| Installation method | Direct attachment, mechanical fixing, and adhesive installation may represent different tested configurations. | Installation details can affect the exposed surface and the test result. | Select a system whose tested installation method matches the project detail. | Review substrate type, joints, gaps, cavity conditions, adhesive, fasteners, and edge treatment. | |
| Project environment | ASTM E84 values do not address moisture resistance, impact resistance, acoustics, or cleanability. | Fire performance is only one part of material selection. | Also compare humidity exposure, traffic level, maintenance needs, acoustic goals, dimensional stability, and installation conditions. | Use separate technical documentation for acoustic, structural, moisture, and durability performance. | |
| Documentation checklist | Look for the reported FSI and SDI values, test standard, date, specimen description, and test configuration. | A classification should be supported by traceable test documentation. | Prioritize products with clear, current, product-specific documentation instead of relying on an unverified fire-rating claim. | Have the architect, code consultant, or authority having jurisdiction review the final selection when required. | |
When choosing 3D wall panels, look beyond their shape and color. Check the Noise Reduction Coefficient (NRC), which ranges from 0.0 to 1.0. A higher rating generally means a panel absorbs more sound within the frequencies measured. It does not mean the room will become silent. NRC also does not describe how well a wall blocks sound from another room.
Ask for test results that match the panel’s intended installation. A panel tested with a deep air gap may perform differently when mounted directly on drywall. Room size, ceiling height, furniture, and hard floors also affect the result. A small meeting room with glass walls may need more absorption than a carpeted bedroom. Details matter.
Listen to the space. That helps. In a large, echoing room, panels with stronger absorption may reduce lingering speech and clatter. For a home office, moderate absorption might be enough, especially with curtains and a rug. Compare ratings, but do not treat one number as a complete prediction. I have seen attractive panels chosen by appearance alone; the room still sounded sharp. That is an easy mistake, and sometimes the test conditions are less clear than buyers expect.
How to Choose 3D Wall Panels for Your Project?
Match Installation Method, Panel Weight, and Substrate to Site Conditions
A panel should suit the wall, not only the design concept. Begin with the substrate: concrete, masonry, plasterboard, or timber framing. Each surface demands different anchors, adhesives, or mechanical fixings. Check moisture, flatness, and load capacity before ordering. A decorative panel may look light, yet its fixing system can add significant weight.
Panel weight affects handling, labour, and safety. Large, dense panels may need two-person lifting or temporary support. Lightweight panels usually install faster, but they can feel less impact-resistant. Do not assume “light” means “better.” The 2023 Global Status Report for Buildings and Construction reports that buildings consume about 30% of global final energy. Panel selection cannot solve energy performance alone, but compatible backing and careful joints can reduce unwanted air movement. This detail is often missed.
Tips: Request the panel’s weight per square metre, required adhesive coverage, and tested fixing method. Confirm fire, moisture, and acoustic performance from technical documentation. The U.S. Occupational Safety and Health Administration identifies falls as a major construction hazard, so avoid improvised ladders or unsupported overhead work. A site mock-up is worthwhile. It may expose uneven walls, weak plaster, or visible seams before installation begins. I have seen projects specify perfect panels for imperfect substrates. That mistake is expensive.
Match installation method, panel weight, and substrate to site conditions.
How to read the chart: Lightweight PVC and PET panels are generally suitable for adhesive or clip-based installation on sound drywall or masonry. MDF panels usually require a flat, dry substrate with adhesive support or mechanical fixing.
Gypsum and fiber-cement panels are heavier and are commonly secured mechanically to studs, battens, or suitably prepared masonry. Stone veneer panels require the strongest substrate and should use engineered mechanical anchoring rather than relying on standard adhesive alone.
Values show representative midpoint weights in kg/m². Always confirm the actual product weight, fixing specification, substrate condition, moisture exposure, and allowable load before installation.